More Country How-To's

Friday, July 17, 2015

Farmers Market Friday - Meridian Township Farmers Market


Welcome to Farmers Market Friday!  


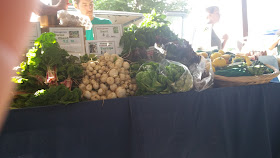
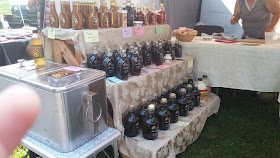
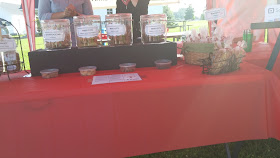
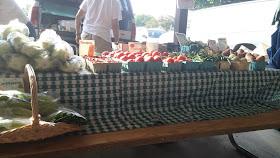
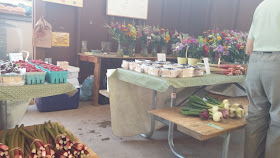
On this sunny Saturday morning, my daughter had a conference at Michigan State University which gave my little buddy and I an excuse to visit the nearby Meridian Township Farmers Market (right behind the Meridian Mall in Okemos, MI) after we dropped her off. 


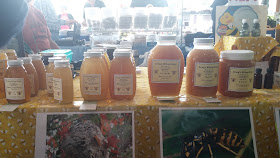
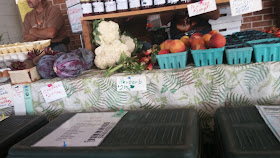
Both of my kids love to take photos and actually have a good eye for visual interest (according to their mom anyways…) so I handed over the smartphone and let my son take the pictures.  


So enjoy the perspectives of a 6-year-old boy and please excuse the height of the photos and the occasional finger in the corner...these are his un-edited pictures.  


At least until he ditched the camera in favor of the breakfast burrito, cider slushie and sugar cookie...by which time my arms were too full of bags to attempt taking more pictures.  


This market is a good-sized one for a weekend market and really just about everything you could think of was represented – Amish goods, goat milk soaps, canned goods, dried herbs, seasonal produce, fresh Michigan lake fish, lamb, tamales…  


 It all looked good!

I always like to let the kids learn from this experience and help make part of the choices of our purchases.  


This gives them the chance to learn about money handling, budgeting, practice their math skills, meal planning, seasonal produce, where their food really comes from (and the people behind it) and practice their manners.  They also are much more likely to try eating new things when they see it looking fresh and appealing and they get to choose it.  


My son, in particular, has never been a big veggie fan unless its potatoes.  But he enjoys salad and even eats the purple cabbage in it so this is an opportunity for him to choose some options for adding to our salads that eventually expand his tastes.  


Just recently he chose some beautiful colored peppers and I diced them over our salad one night.  He was a little leery until I reminded him that those were the peppers he chose.  He started eating them and then added the comment "These are really good, Mom.  They add a little more flavor to my salad!"  I've been slowly working them into other things like fajitas and its been much easier to get buy-in.  


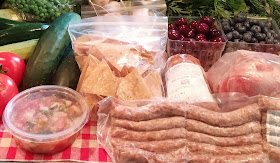
So how did we make out?  Pretty well I'd say!


$9 for:
1 pint Michigan sweet cherries
1 pint blueberries
2 cucumbers

$18 for:
1 lb chorizo
1 package sausage links
2 lbs chicken legs

$18 for:
small container pico de gallo
quart baggie fresh tortilla chips
6 shredded pork tamales
1 bacon breakfast burrito

$9 for:
1 quart fresh peas
4 zucchini (mixed variety)
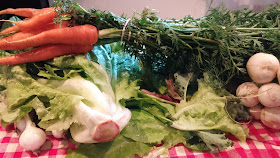
1 bunch carrots

$4 for:
4 on-the-vine tomatoes

$5 for:
1 bunch turnips
1 bunch green leaf lettuce

$4 for:
cider slushie
sugar cookie  

Total: $67


Add to that the handful of snap peas, handful of raspberries, salad bowl of loose leaf lettuce, 2 green onions, and handful of mild banana peppers we harvested out of the pallet garden that evening - a nice summer's bounty!

So how did that translate to meals for the week?  Well, the breakfast burrito we shared on our walk-through.  The slushie and sugar cookie were treats on the way home.  


Meal #1 - The tamales, chips and pico de gallo were lunch the next day.  
Meal #2 - The blueberries became blueberry syrup and blueberry pancakes.  
Meal #3 - The check thighs were stewed with some of the carrots and the onion all day and then served over rice for dinner.
Meal #4 - The breakfast sausage, store-bought frozen shredded hashbrowns ($2), and eggs I already had were turned into breakfast-for-dinner one night.
Meal #5 - The turnips and rest of the carrots were diced and sauteed with diced potatoes I already had and 1 lb of lean ground beef from the store ($6), topped with shredded taco cheese ($1) and a fried egg.
Meal #6 - The chorizo was cooked, then combined with jar spaghetti sauce ($1.50) and a can of diced tomatoes with basil ($.80), then added to cooked, drained penne pasta ($1).
Meal #7 - The peas will be combined with small shell pasta ($1), canned tuna fish ($2), chives from my garden, and sour cream I already have on hand, along with seasonings from my stash for a tuna pasta salad (this basic recipe with canned tuna added) for dinner.
Dessert #1 - The cherries were mixed into cheesecake mix ($2) for dessert.  


The lettuce, tomato, cucumber have been used as side salads with several meals but I still have some left so that will be served with grilled sliced chicken breast for chicken Caesar salad.  Most of these meals made enough for at least one person to have for lunch the next day.  Pretty awesome eating for a week!


Friday, July 3, 2015

4th of July Roundup - Fast Food and Fun Projects


Hosting a last minute get-together for the 4th?  A roundup of easy finger foods and simple projects to keep kids entertained!  Start with this Blueberry Sparkle Punch - just use red, white and blue sugar crystals to rim the glasses!


Finger Foods - use star-shaped cookie cutters!


More easy, festive and fun finger food - the kids can help you make them!


And finally - Fireless Sparkler Wands!  You'll need popsicle sticks, curling ribbon in assorted colors and a container of assorted sized sticker-backed foam stars.  Cut the curling ribbon to varying lengths and curl.  


Let the kids mix and match colors.  Take 2 large stars and remove the backing from one.  Lay the tip of the popsicle stick in the middle.  Remove the backing of the second large star and "sandwich" the popsicle stick between the two stars (press firmly to seal it well).  


Bundle together the ribbons and tie the center of the bundle around the popsicle stick to make a firm knot. Take small stars and stick to the hanging ends of some of the ribbons.

Happy Fourth of July!

Thursday, July 2, 2015

My Pinterest Pallet Garden - Year 4


Pallets are all the rage for projects the past couple of years and my pallet garden has been one of the most visited posts on my blog.  Inspired by a drought, overgrown field, lack of time, and yes, Pinterest…my pallet garden is still working very well for me and my over-committed life four years later.  


Year 3 (sadly I never got around to a post about last year's garden and my phone and camera were fried so I can't even find any pictures!)


While I aspire to have a huge, highly productive veggie garden like my neighbor, I lack the time (and patience most days) to keep up with it like that style of gardening requires.  Enter the pallets.  


This not only filled an ugly spot along the side of the barn, but also takes advantage of the rain runoff from the barn roof which means very little watering is needed.  


It is exposed to the north and west, but the barn offs a little protection from the wind off the field and the harshest sun in the late afternoon.  Its easy to feed my goat the damaged plant pieces and weeds as I take care of it - his pen is right by the end of this row.  


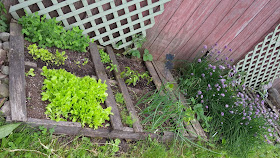
And the pallet keeps most weeds from growing between rows.  I’ve been able to protect most of the plants from the bugs a little better this year by planting more onions and herbs between rows of lettuce and brussel sprouts that usually get pests pretty easily.  


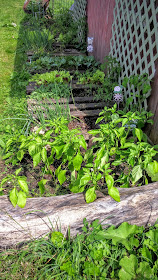
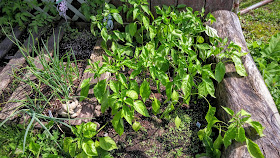
The one issue I’ve had this year is that the rain we’ve had has been pretty hard downpours so actually washed some of the soil downhill.  I never enclosed the ends of the pallets so instead I piled small field rocks into the space and that seems to be holding well.  I took advantage of the spaces at the ends of the pallets where there were awkward spots to try to mow and on the downhill side where the potting soil that washed out of the pallet accumulated.  In this spot I used my sitting log as the defining edge and planted the area with peppers.  There is a large variety here and they seem to like the spot.  


On the uphill end I had a spot where some tomato seeds had sprouted themselves last year and did very well so I just planted most of my tomatoes there.  Our generous neighbor gave me some and others I scored at the local greenhouse on sale after Memorial Day.  I have since covered some of this with old hay as mulch.  


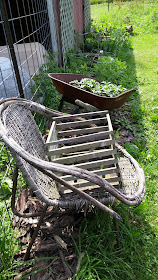
To define the end, I used large strips of bark that have accumulated from my husband splitting fireplace wood and laid them down as mulch strips so the mower edge can be run right up to them.  Then I used the old wheelbarrow that has holes worn through to plant potatoes.  They seem to be pretty happy and despite the dog knocking it over a couple of times I can see little potatoes starting to form.  This picture was taken about a week ago and I have since covered the plants in a layer of old hay.  When they start peeking out again I will use dirt again for the next layer.  


The kids and I have a lot of fun with this garden and although it doesn’t produce massive quantities, it gives us some fresh nibbles and lots of herbs to brighten up our meals and teaches the kids a lot about growing and nature.  We really enjoy watching the honey bees from our neighbor’s hive come visit and our goat really enjoys the trimmings.  If you don’t have a lot of space or a lot of time, but still want a hands-on way to teach your kids about growing your own food or just want a few little fresh goodies, I highly recommend pallet gardening.

Wednesday, June 24, 2015

20 Things to Look for at Michigan Farmers Markets this Summer

As I did not have a chance to get together a new Farmers Market Friday post for you last week, I wanted to share with you this great rundown of Michigan farmers markets.  Our own local farmers market has added a new night on Thursdays in conjunction with their summer concerts - I'm hoping to be able to stop by and see my regular "egg lady" and give you a tour!


20 Things to Look for at Michigan Farmers Markets this Summer

Tuesday, June 9, 2015

Dining Room Update


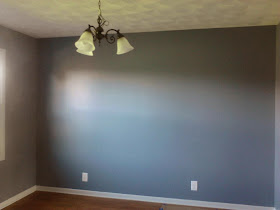
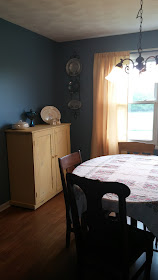
This dining room has come a long way in two years.  All the way from this...


You can see the beginning of the transformation here.  It’s one of those rooms that I only had a partial vision for and I didn’t really have much to put in there beyond all the dishes I had stored away.  My old dining room in the other house was too small and really non-functional so we mostly used it for projects. 


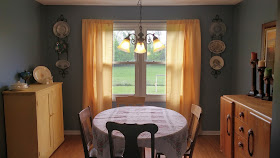
I knew this was one of the rooms I wanted to be a little more bold on the colors than other areas of the house and since my husband and I both like blue, we settled on this "Royal Gray".  


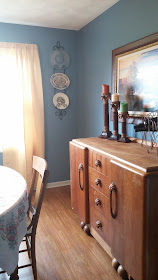
Once the light got a makeover, my mom donated the table and chairs, as well as the hutch and the giant picture (which I absolutely love) which were gifted by one of her friends. 


I asked my husband for plate racks for Christmas this year.  They have been on my wish list for years but I never really had a place to put them anyways.  


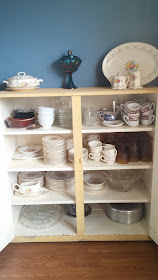
Some of the plates are ones I’ve collected over the years at thrift stores and auctions.  Others were passed down to me through my family.


The hutch now holds a collection of “the good china” dishes from my great-grandmother (my mom’s dad’s mom) and other treasures from several generations on all sides of my family.  Someday I would love to catalog these dishes and their stories.

I am still undecided on what to do above the hutch and on the east walls that lead to the library room (which is another project awaiting some furniture and inspiration…).  I’m torn between finishing the top part of the hutch in some fashion and putting it back on top or hanging a few treasures like the antique printing press drawer above it for bric-a-brack.  I’m on the search for a taller narrow table to use for serving and I have a mirror and some shelves to hang above it on the one side of the doorway.  Its a good excuse to go hit some auctions anyways...